
Executive Summary
Count the leads you never called back. A shop that gets 40 form fills a month and answers each one a day late likely loses 8 of them to whoever replied first. At $150 per job, that is $1,200 slipping away every month. A GoHighLevel tutorial for beginners should plug that leak before it tours the menus. This guide runs a sequenced first week: business profile, one pipeline, one lead form, one welcome automation, one booking calendar. Each step takes minutes, and you finish with a lead system that answers in seconds.
Most beginners waste their first trial week clicking through every menu. This guide is different: it gives you a sequenced, first-week checklist so you build the foundation that actually generates leads, then layer advanced features on top.
Table of Contents
- Before You Start: What You Need
- GoHighLevel Account Structure Explained
- Step 1: Set Up Your Business Profile
- Step 2: Build Your First Pipeline
- Step 3: Add a Lead Form
- Step 4: Create Your First Automation
- The First Automation You Build: Form to Booked Appointment
- Two Beginners, Two Setups, Two Outcomes
- Step 5: Connect Booking Calendar
- Step 6: Set Up Email and SMS
- Your First-Week Checklist
- Common Beginner Mistakes
- GoHighLevel Beginner FAQ
- Your 30-Day Check: Keep or Cancel GoHighLevel
Before You Start: What You Need
You only need three things to complete this tutorial: (1) a GoHighLevel account (start on the 14-day free trial), (2) a domain name or a free HighLevel subdomain if you want to publish a page, and (3) a phone number and email address you control for verification and sending. No technical skills or coding required.
- A HighLevel account – sign up through the free trial link; the starter plan starts at $97/mo after trial.
- A domain (optional but recommended) – about $10-$20/year from any registrar; you can also use a subdomain while testing.
- Your business details – name, address, phone, email, and service/products you sell.
- 10-15 minutes per step – most setup actions take minutes, not hours.
If you have not signed up yet, read our GoHighLevel free trial guide first so you understand what the 14-day access includes and how to avoid common activation pitfalls.
GoHighLevel Account Structure Explained
Before touching the software, understand the three layers: Agency Account → Location (Sub-Account) → Contacts. This is the single biggest mental model beginners miss.
- Agency account – your top-level login where you manage clients, billing, and branding (this is the account you log into at app.gohighlevel.com).
- Location / sub-account – each business you run (or each client) has its own separate workspace where the CRM, funnels, and automations live.
- Contacts – the people inside each location; pipelines and campaigns operate on these records.
If you manage one business, you still work inside one location under your agency account. This structure is what lets agencies resell and white-label the platform – see our agency guide for the full breakdown.
Step 1: Set Up Your Business Profile
After login, open your location and complete the business profile: name, address, phone, timezone, and branding. This is where your emails and SMS come from, so get it right before testing.
- Go to Settings in your location and fill in the business name, address, and contact details.
- Set your timezone and working hours – automations and the calendar use these for scheduling.
- Upload your logo and brand colors for client-facing pages and emails.
- Connect your sending phone number (Twilio or HighLevel numbers) and verify email sending domain (SPF/DKIM/DMARC).
- Save and confirm the profile appears on the dashboard.
Skipping verification is the #1 cause of email not sending later. Spend the extra five minutes on SPF, DKIM and DMARC now.
Step 2: Build Your First Pipeline
A pipeline is your sales funnel on a kanban board: New Lead → Contacted → Proposal → Won (or your own stages). GoHighLevel ships a default pipeline, and you can edit stages in seconds.
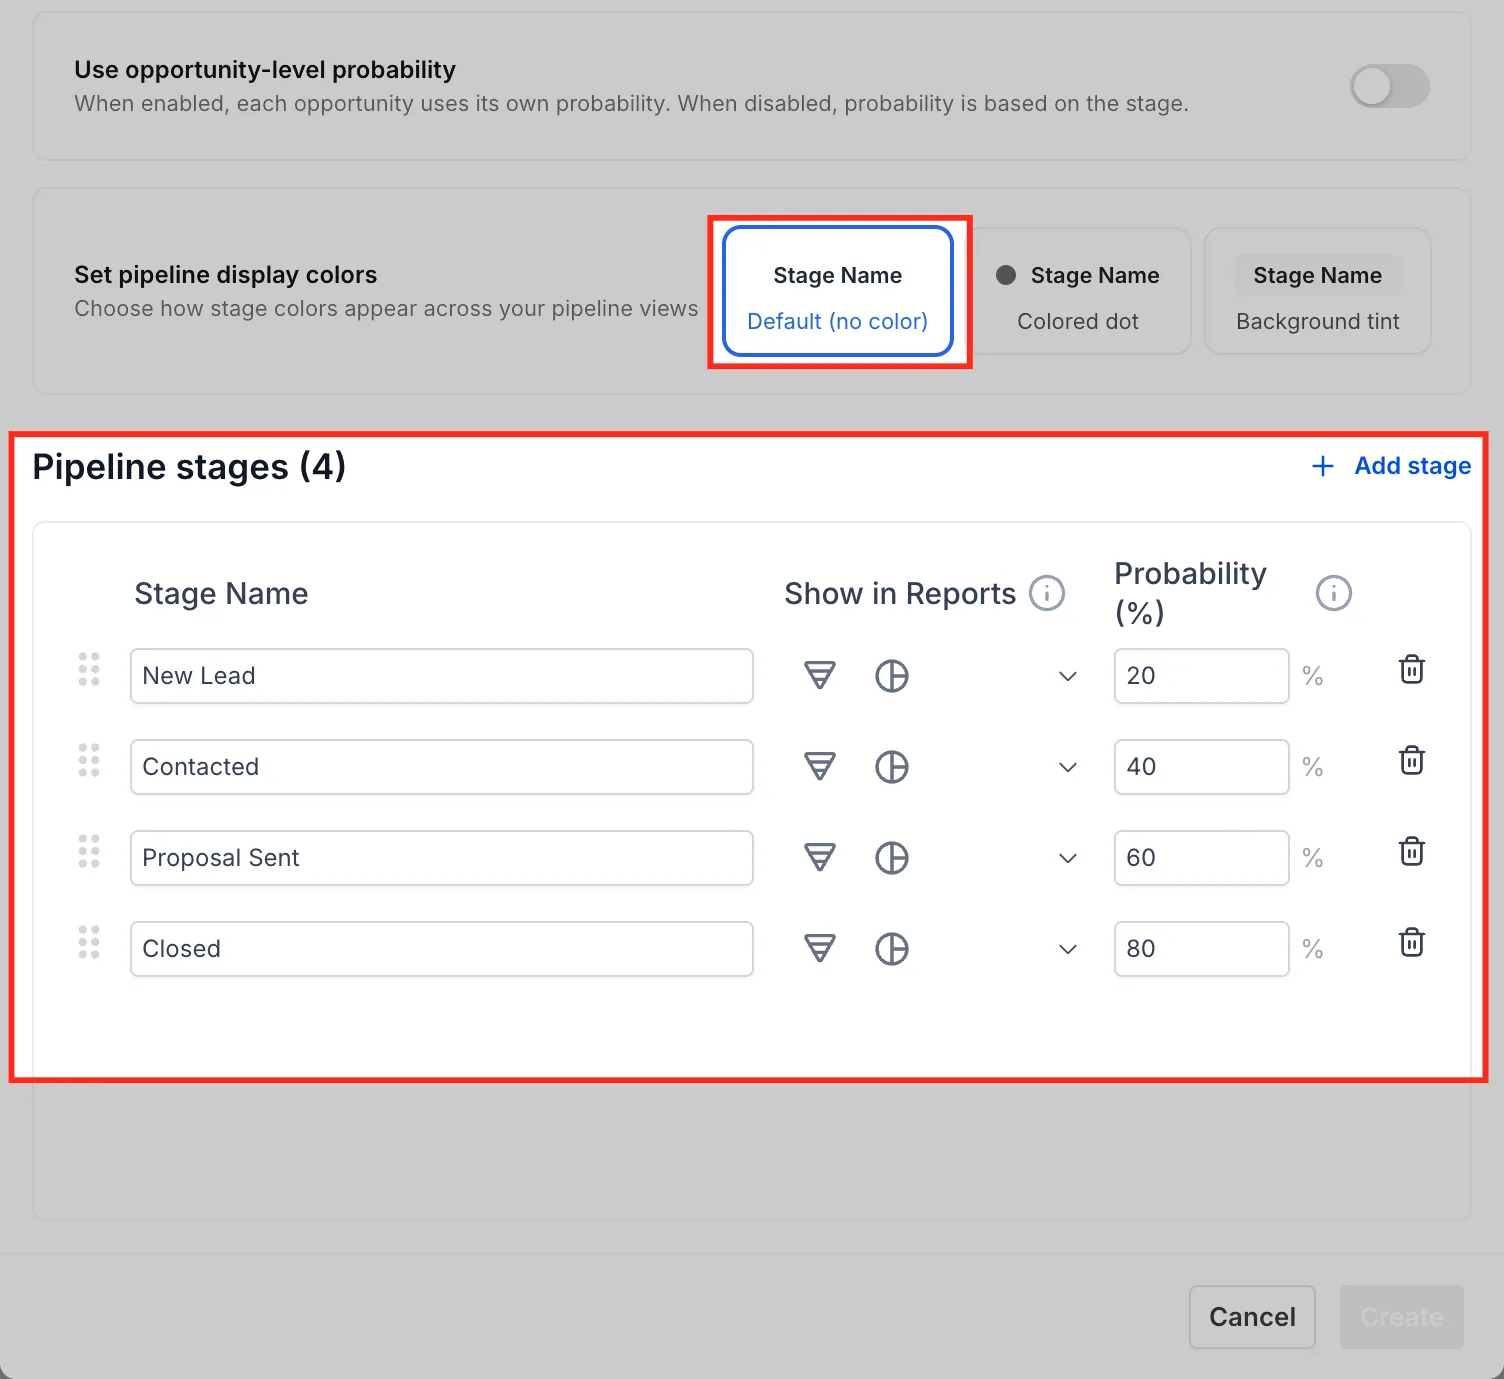
- Open the Pipelines section (under the CRM menu).
- Keep the default pipeline or create a new one for your offer.
- Rename stages to match your sales process (e.g., New, Contacted, Demo Booked, Won).
- Set up pipeline notifications so you get a ping on every new deal.
For a deeper look at how pipelines map to real sales processes, our pricing guide includes which plans unlock unlimited pipelines and sub-accounts.
Step 3: Add a Lead Form
A form captures first-party leads. GoHighLevel includes a form builder that pushes submissions straight into your pipeline.
- Go to Marketing → Forms & Surveys → Create Form.
- Choose a blank form or a template (e.g., Contact Us, Appointment Request).
- Add fields: name, email, phone, message, and any qualifying questions.
- Select the pipeline and stage where new submissions should land.
- Publish or embed the form on a page; copy the direct form link.
Test the form yourself before driving traffic. A broken form that drops leads is worse than no form at all.
Step 4: Create Your First Automation
Automations (workflows) let you react to triggers instantly: when a form is submitted → send a welcome email and SMS → assign a task → move the deal. Start with one simple workflow.

- Open Workflows (under Automations).
- Create a new workflow with trigger “Form Submitted” (or “New Contact”).
- Add a delay of 1 minute, then an Email step with a welcome template.
- Add an SMS step for contacts who have a phone number.
- Add a task assignment so you or a teammate follows up.
- Turn the workflow on and test with a real contact.
If your automation does not fire, check the trigger and contact level – our automation fix guide walks through the 11 most common causes.
The First Automation You Build: Form to Booked Appointment
This is the one workflow to build in week one. It answers every new lead in seconds, nudges them to book, and tells you when to call. If the canvas confuses you at first, the honest learning curve guide walks through the basics.
- Trigger: Form Submitted (your lead form with name, email, phone, and service question).
- Action: Create/Update Opportunity so the contact lands in the ‘New Lead’ stage of your pipeline board.
- Action: Send SMS ‘Hi {{contact.first_name}}, your request just came in. Grab a slot here: {{calendar.link}}’ — only when the phone field is filled.
- Action: Send Email with subject ‘We got your request’ and the same booking link.
- Wait: 1 hour.
- If/Else: check whether the contact booked an appointment. If yes, go to step 9. If no, continue.
- Action: Send SMS ‘Still want to get scheduled? Reply with a good day and time and we will set it up.’
- Wait: until the contact replies, up to 24 hours.
- If/Else: if the contact replied, Action: Internal Notification to you with the message text. If no reply, Action: Add Task ‘Call this lead today’ assigned to you.
- Action: Add Contact Tag ‘new-lead’ and turn the workflow on. Test it with your own phone number.
What to measure: the share of form fills that book within 48 hours, and the number of tasks your workflow creates each week. If bookings climb while tasks drop, the flow is working. If tasks pile up, your SMS wording or booking link needs a fix. When a workflow stays silent, the automation troubleshooting steps cover the usual causes.
Two Beginners, Two Setups, Two Outcomes
Both stories below are invented to show the arithmetic. Treat them as illustrative scenarios, not testimonials.
Imagine a solo dog-walking business in Portland, Oregon. One owner, roughly 25 inquiry calls a month, and every call lands in voicemail while she is out with dogs. She returns calls at night, and maybe 10 of the 25 book. She builds the pipeline first, then a form on her site, then a workflow that texts a booking link the moment a form arrives. If the instant reply lifts bookings from 10 to 15 a month at $40 a walk, that is $200 more per month from the same calls. Setup takes one afternoon.
Imagine a two-person cleaning company in Tampa, Florida. Ads bring 60 leads a month, but they sit in an inbox and get answered two days later. Half go cold. They connect a form to a pipeline stage, add a welcome email and SMS, and attach a booking calendar. If faster replies recover 12 of those 30 lost leads at $120 per clean, that is $1,440 a month. The owner checks the pipeline board each morning instead of the inbox.
Step 5: Connect Booking Calendar
A booking calendar lets leads pick a time that fits your work hours and auto-creates the event and reminder sequence.
- Open Calendars → New Calendar.
- Set your availability (business hours, buffer between meetings).
- Add your video meeting link (Zoom or Google Meet).
- Attach a buffer workflow to send reminders and follow-up messages.
- Copy the booking link and add it to your email signature and funnel.
Combine the calendar with a workflow and you have an automated appointment system – no back-and-forth emails.
Step 6: Set Up Email and SMS
GoHighLevel includes email and SMS marketing in the subscription (with usage-based limits). Configure your sending identity so your messages land and comply with carrier rules.
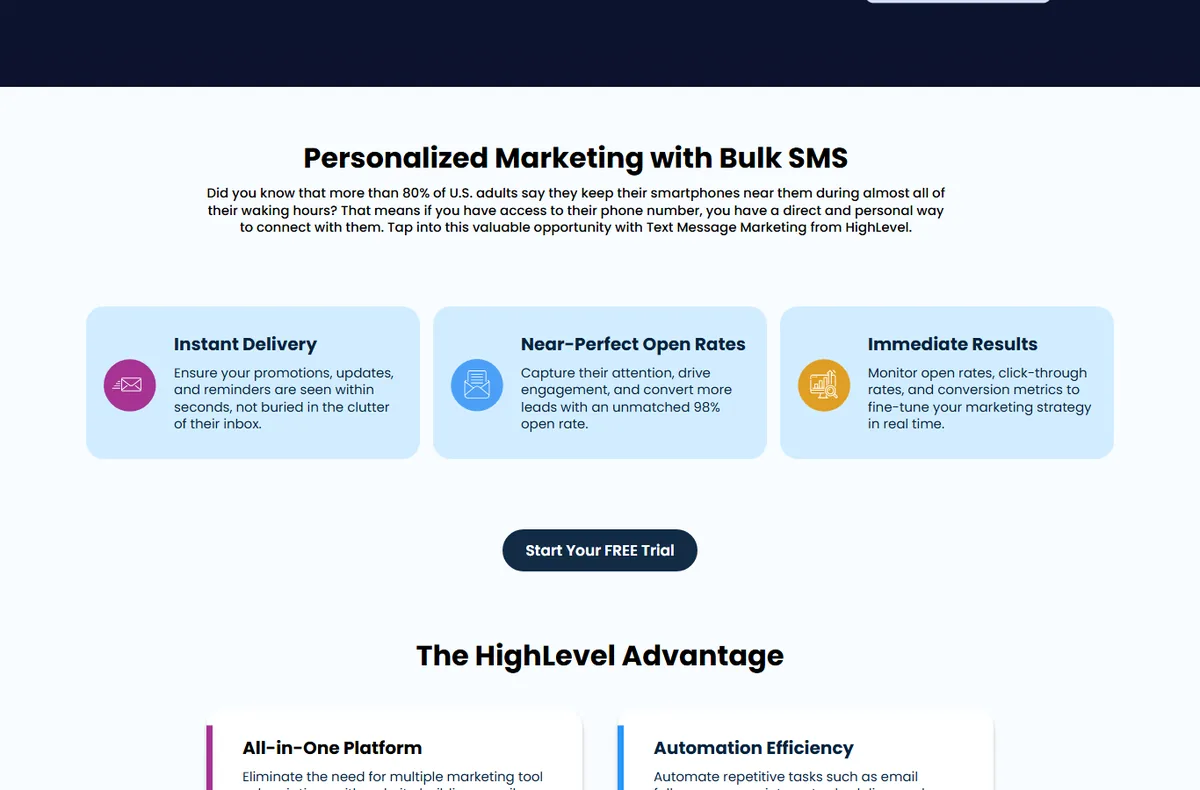
Here is how the core sending tools compare inside GoHighLevel, so you know which one to use for each job:
| Tool | Where to find it | Best for |
|---|---|---|
| Email campaigns | Marketing → Email | Broadcasts to a list, drag-and-drop builder, A/B testing |
| SMS campaigns | Marketing → SMS | Bulk texts to opted-in contacts, two-way replies |
| Workflow emails | Automations → Workflows | Triggered 1:1 messages (welcome, follow-up, reminder) |
| Workflow SMS | Automations → Workflows | Triggered texts with personalization tokens |
| Conversation inbox | Conversations | All channels in one thread for live replies |
- Email – verify your sending domain and set SPF/DKIM/DMARC so campaigns pass spam filters.
- SMS – register for A2P 10DLC (US) and connect a compliant number; do not bulk text without opt-in.
- Unified conversation inbox – manage emails, SMS, and chat from one thread so nothing slips.
- Broadcast vs workflow – use broadcasts for one-off blasts, workflows for automated sequences.
Email and SMS limits differ by plan; check the pricing page for current sending allowances.
Your First-Week Checklist
Here is the whole foundation in one checklist. Tick each item off before adding advanced tools.
- ☐ Sign up on the 14-day trial and log in.
- ☐ Complete business profile + verify email domain.
- ☐ Connect a phone number and pass A2P registration.
- ☐ Build your pipeline (at least 4 stages).
- ☐ Create a lead form and test it.
- ☐ Turn on one welcome automation.
- ☐ Connect a booking calendar.
- ☐ Import 10-50 real contacts and clean duplicate data.
- ☐ Send a test broadcast to yourself.
Here is the same checklist mapped to a real first-week calendar, so you know what to do on which day:
| Day | Focus | Why it matters |
|---|---|---|
| Day 1 | Sign up, explore the dashboard, complete the business profile | Know your login and contact details |
| Day 2 | Verify email sending domain + connect a phone number | Prevents deliverability failures |
| Day 3 | Map your sales process and build the pipeline | Stages match how you actually sell |
| Day 4 | Create a lead form and test it end-to-end | Submissions land in the right stage |
| Day 5 | Build one welcome automation (email + SMS) | New leads get an instant response |
| Day 6 | Connect a booking calendar and link it to the automation | Leads can self-book |
| Day 7 | Import real contacts, send a test broadcast, review reports | Live validation before you scale |
You do not need to finish all seven days to get value. Even completing days 1-5 puts you ahead of most beginners who spend their trial just clicking around.
Common Beginner Mistakes
- Building before mapping – write your sales process on paper before you configure stages and workflows.
- Duplicating tools – do not keep an old CRM and GHL in parallel; migrate everything in the first week.
- Skipping verification – not validating email and SMS sending causes silent failures later.
- Too many automations at once – ship one workflow, measure, then add more.
- No tags/statuses – use tags (e.g., “lead”, “client”, “VIP”) from day one so lists stay clean.
GoHighLevel Beginner FAQ
Is GoHighLevel hard to learn for beginners? No. GoHighLevel has more features than a simple CRM, but a beginner can get a working pipeline, form, automation and calendar running in a few hours using the setup order in this guide. HighLevel Academy provides free training, and the platform ships templates for forms, funnels and workflows.
How do I start using GoHighLevel? Sign up for the 14-day free trial, log into app.gohighlevel.com, complete your business profile, then follow this first-week checklist: pipeline, form, automation, calendar, email/SMS verification.
Is there a free GoHighLevel tutorial? Yes. HighLevel Academy (gohighlevel.com/academy) offers free video courses and certifications, and the support portal has step-by-step articles on launching funnels, importing contacts, and setting up SMS campaigns.
How long does GoHighLevel take to set up? A lean setup – business profile, one pipeline, one form, one automation and one calendar – takes 2-4 hours total. Complete configuration for an agency with multiple locations and white-label branding can take a few days.
Do I need technical skills to use GoHighLevel? No. The platform is drag-and-drop for funnels, websites and workflows. You do not need coding skills; some familiarity with DNS (for custom domains) and SPF/DKIM/DMARC (for email sending) helps but is not required to start.
What is the first thing I should build in GoHighLevel? Build your pipeline first – it is the backbone of everything. Add your sales stages, then create a lead form that feeds the pipeline, then attach a welcome automation to that form trigger.
Is GoHighLevel suitable for one local business? Yes. Many solo owners use Starter ($97/mo) for a single business: one location, one pipeline, one booking calendar. You do not need an agency setup to get value from the platform.
Is GoHighLevel good for beginners with no marketing background? Yes. HighLevel Academy, the template library, and the support portal are built for non-technical users. Start with one funnel template, one automation and one calendar, then expand after you see results.
Your 30-Day Check: Keep or Cancel GoHighLevel
Watch one number in your first 30 days: the percentage of new form fills that reach a booked appointment. Open your pipeline board, count leads in ‘New Lead’, and compare with appointments on the calendar. If that share climbs above where you started, keep the setup and add one more workflow. If it stays flat, check your SMS wording and booking link before you cancel. The trial gives you enough time to see the trend, and the plan and trial breakdown shows what you pay after it ends.
Start on the free trial today, work through the checklist above, and you will have a functioning lead system before the trial ends.
Disclaimer: We are an independent review site. Some links in this article are affiliate links, and we may earn a commission at no extra cost to you if you purchase through them. We only recommend tools we test in real client operations.
About the Author

Antonio Vance is B2B SaaS Operations Director & Lead Reviewer (SaaSFlowLab Editorial Team). He has spent 8+ years deploying and auditing enterprise CRM, marketing automation, and email deliverability infrastructures for digital agencies. At SaaSFlowLab, he directs hands-on testing of software stacks in live production environments to deliver uncompromised, field-verified software reviews.